So you have your empty project. Now what?
Let us start with putting some content into the system, and although we recommend you start with identifying your initial risks and actions, we will explain how to start planning your initial 3 level plan. This can always be extended.
On the left menu bar you will find a “Target” icon with the words “OKR/Plan”. Click on it and it will bring you to the next screen.
We always work with a maximal 3 level plan. Our experience learns that this is enough for projects to be easy to comprehend and also key stakeholders find it easy to digest even the biggest plans.
Where other tools start with the start date we plan backwards and in the following 3 steps we explain how that works. You will see that planning backwards from your initial objective is relatively easy and also easy to track and trace. We call it OKR+D planning. Objectives (Level 1), Key-Results (level 2) and Deliverables (Level 3). Let ‘s start.
Level 1: Your Objectives
In every project, we always find the things we would like to achieve. This can be as crisp and clear as “House Build by 5-Jan-2023,” but there are hardly any 1 objective projects. In our example, we will work thru a simple 3 objective plan. We recommend using the following sentence for yourself when you plan:
“We will achieve X by DD-MMM-YYYY”
As we have 3 objectives, this then becomes:
1) We will finish the pre-work by 15 December 2022
2) We will have executed our work by 15 July 2023
3) We will have handed over our work to the operational team by 30-November 2023
Let’s start adding these objectives to the system:
You will see a empty roadmap with the start and the end date. Below
At the bottom, you will find a simple form to add the Objectives.
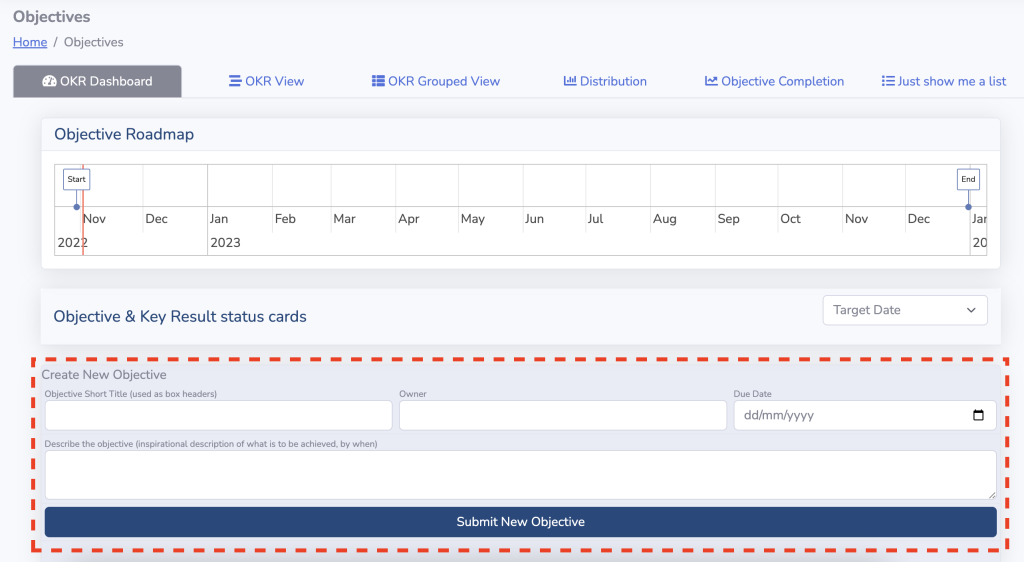
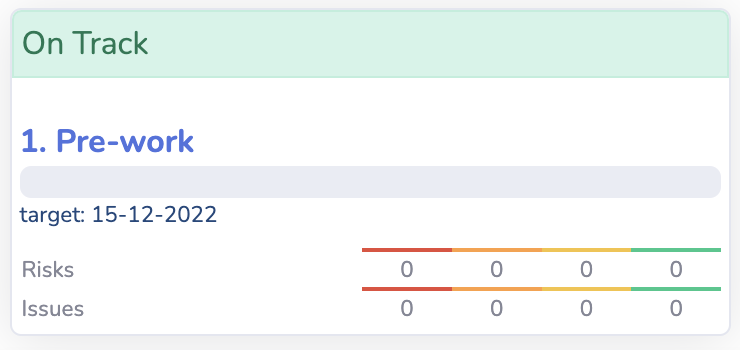
Once you have filled in the title “1. Pre-Work”, the name of the team (in our example, I used Demo) and the Target end date (15-12-2022), and a small description of the end state of the objective, you click on “Submit new objective, and a card like on the left Appears.
This is your objective card. This card gives you a very high-level status view of your objective and the underlying key results. (Explained in more detail in Level 2)
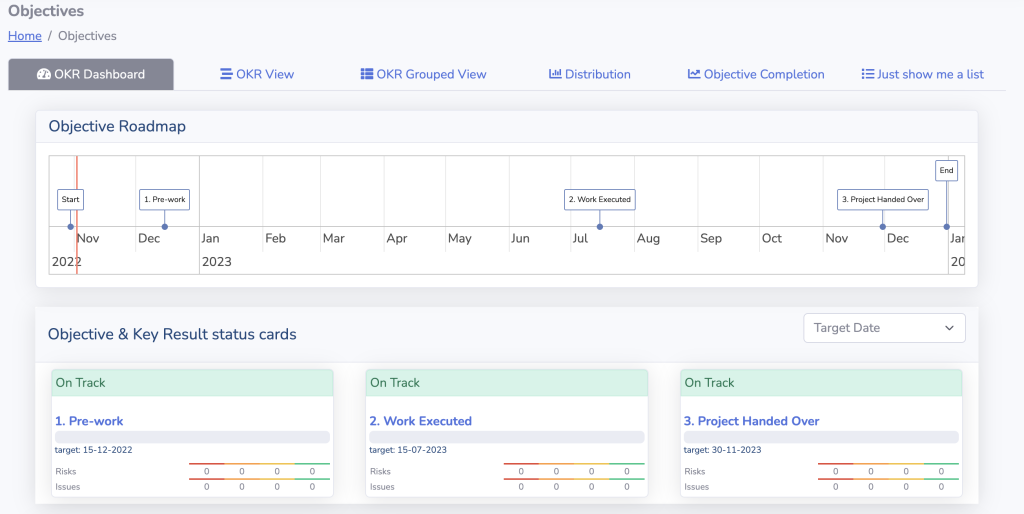
Keep on adding the objectives, and you should end up with the following like below.
Congratulations: Your objectives have been added. We have our Level 1 Completed.
Let me explain what you see on the right:
On the top, you will see your various tabs with views. Click on them, and take a look, but until we add the 3rd level, the information is high-level.
Secondly, you will see the Objective roadmap with a red line. The red line represents today. You also see the 3 objective deadlines, the start date, and the project end date. Easy to take a screenshot and put it in a presentation.
Below the roadmap, you will find your Objective cards. These show you how far you have completed your objective and any risks or issues associated with the Objective you are trying to achieve..
Level 2: Your Key Results - Phases
Now it has become more interesting. In the second level, we answer the following planning question:
What phases or building blocks will deliver us our objective(s)?
Think of it this way: What container of deliverables will get the team to complete and achieve the objective by its target date? In our example, We will use 4 Key Results
- Mobilize the team by 07-11-2022
- Understand the current state by 15-11-2022
- Future state determination by 01-12-2022
- Plan the work for execution by 15-12-2022
When you start working on a project, this is mostly all the information you might have in the initial phase. The one thing we do know for sure is that the 4 points need to be done before 15-12-2022. You also see I have added one simple thing after each key result: by dd-mm-yyyy. Always plan with the end in mind on your Key Results (level 2).
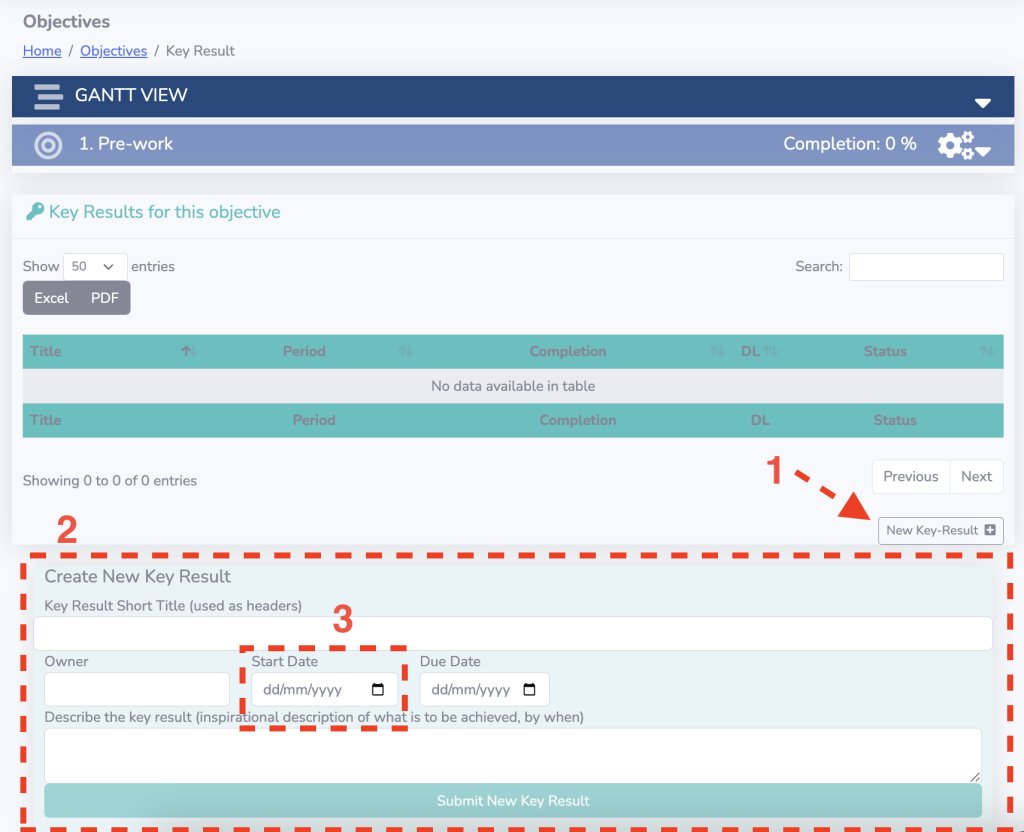
To add a key result, you click on your Objective card which will bring you to the view as shown here.
- Click on “New key result (the form will appear)
- Fill in the form.
- Notice it has a start date.
The start date is a mandatory field, only in the key results. Just think of, How long I need to complete this Key-Result and plan the start-date backward.
Once completed, you can move to the next key result.
TIP:
A good practice we found out is to number the Objectives and Key results. This way it is easy to recognize to which objective a key result belongs. You can see it by the number. This is “by-design,” not automated!
In our example, the objective starts with “1. Pre-work,” and our Key-Result start with “1.1 Mobilization”. (it is clear that mobilization belongs to objective 1 this way. As I mentioned, it is just good practice. Not mandatory.
Once you have added all the Key-Results the plan starts to begin to get some shape and clarity already. (and you are just at level 2).
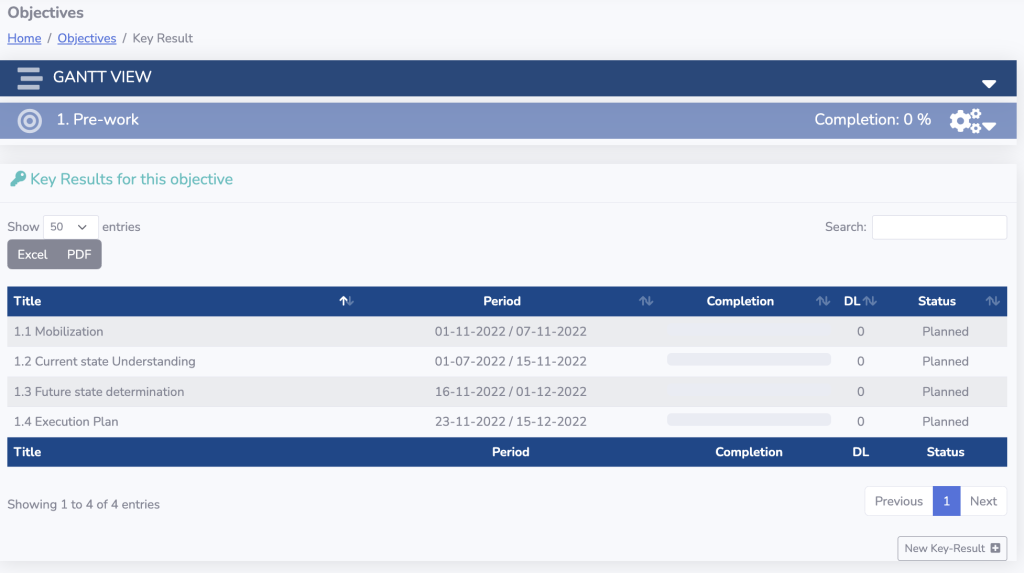
What you see now is that we have planned and determined our level 2 phases with their respective start dates and dates it needs to be finished.
You can export this table to a pdf or an excel for easy communication.
Notice also in the table the “DL” column. This DL represents Level 3, but we will focus on this later.
DL stands for “Deliverable”

For our validation, we can click on the “objectives” link at the top of the page, and this will bring you back to the objectives overview. You will notice our objective card has changed once more and was enriched with the key results.
Think of it this way. In our example, we have a relatively simple project, but in the same manner, we can use the objectives and Key-Results to plan a much more complex project with multiple objectives and Key results.
—
In one of our real situation test cases, we had 1 project with over 10 objectives and 64 key results. Not even in one moment did we not understand what was going on and where we needed to focus. This was a great insight and improvement.
Level 3: Your Deliverables / Artefacts
For our example, we have 4 things to arrange/deliver in our mobilization phase:
1. Confirm all team members by 2-11-2022
2. Arrange Workspaces for the team by 3-11-2022
3. Organize an internal kickoff by 5-11-2022
4. Team confirmed and presented by 7-11-2022.
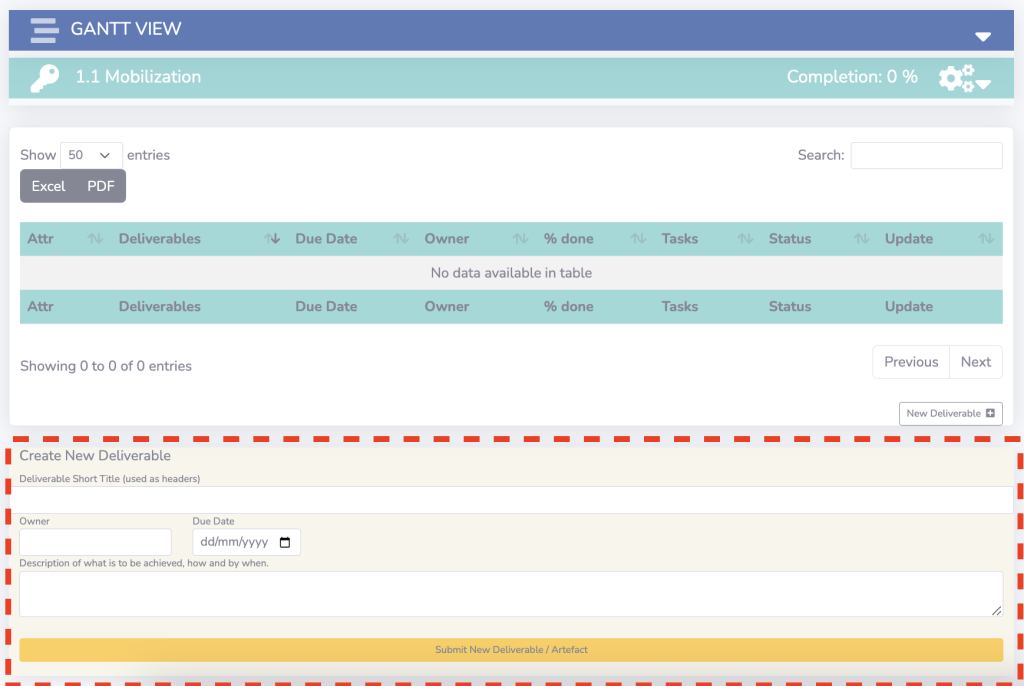
As a next step, we click on the key-result line, and we will find the next screen, as shown on the right, with the deliverable form highlighted. It is now as simple as filling in the form and clicking submit.
The Deliverables will start to add to the list and will also start to become visible in the various reports
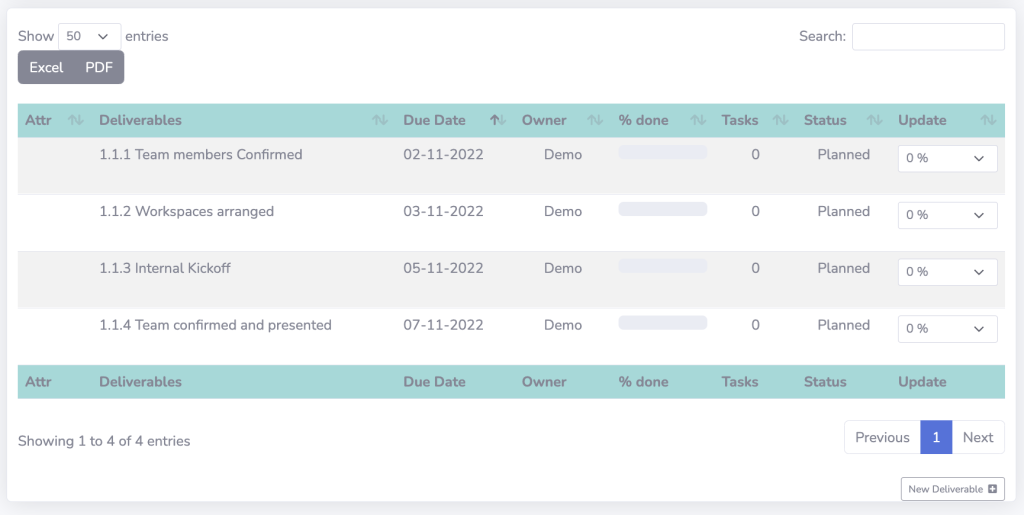
Once you have entered all the deliverables, you will see the list appear as represented here. As you can see you have the option to export this list to a PDF or excel for sharing, but the updates need to happen here. In a different post we will go deeper into the ways you can add trackers, KPIs, and actions to a deliverable and even make it a milestone or give it focus. For now.
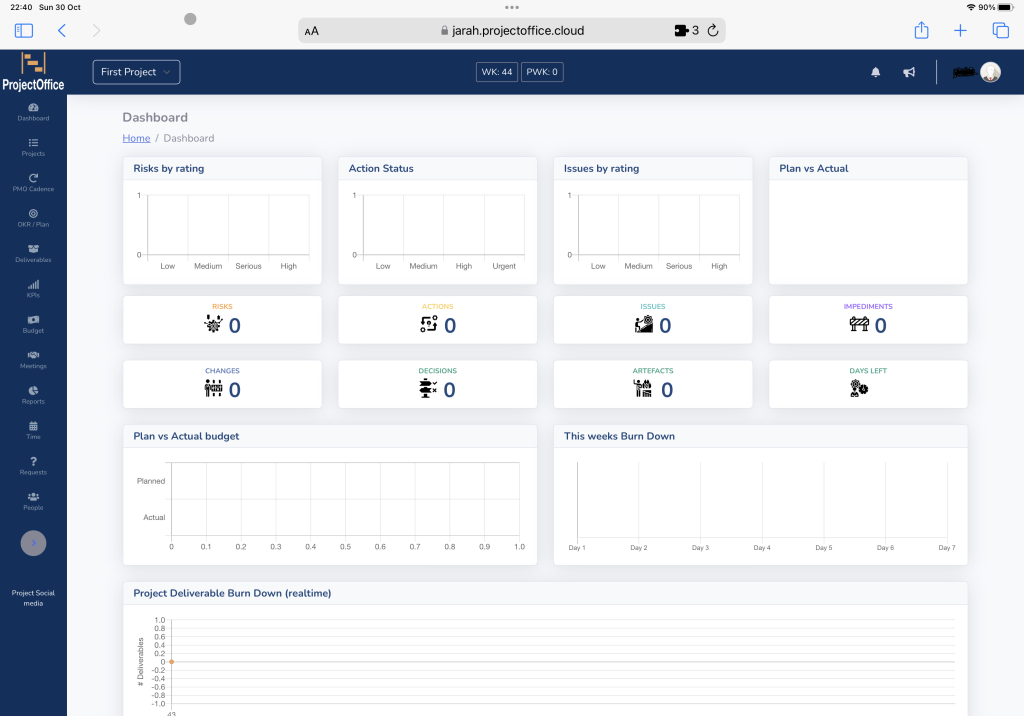
The steps give you a good insight into how to add your plan to the system. In the last screen, we show you what your dashboard now looks like and what you see has changed there already… Let’s take a look.
RESULT: Your new Dashboard
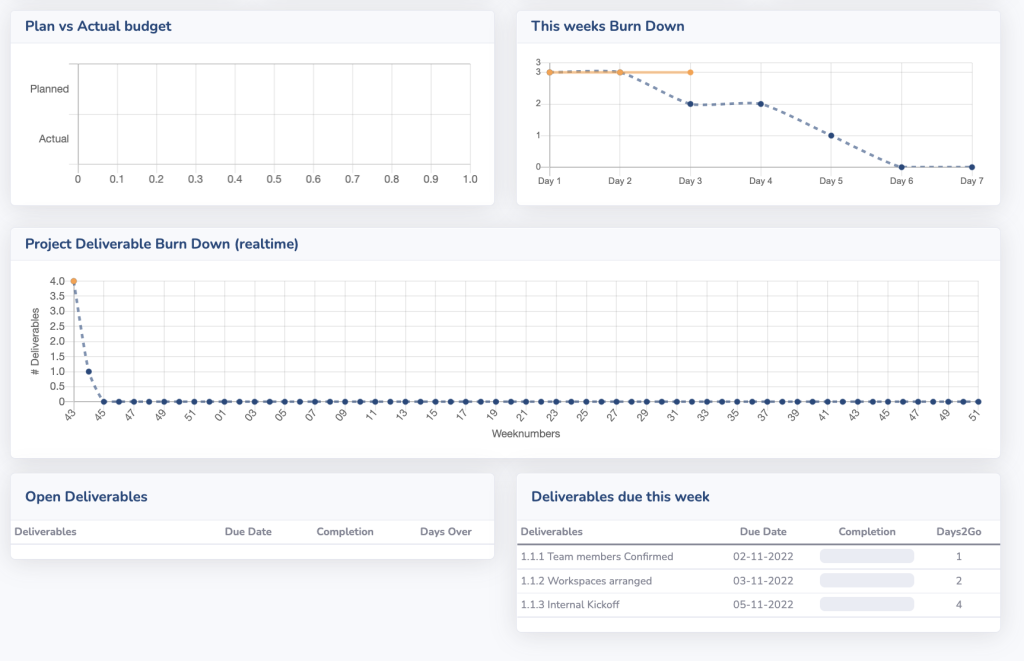
Now let’s take another look at your dashboard and observe the changes:
- This week’s burndown now shows the three deliverables for this week
- The overall project burndown now shows all the deliverables
- There are deliverable due for this week (as per your plan) and it is showing on the bottom right column.
As you notice, information is made available the moment it is entered, giving you a real time accurate picture of the provided information, ready for immediate use.
If you have any questions or would like to request a demonstration, contact us at support@projectoffice.cloud.